
I have recently been building a backend application, we reached a point where we needed to be able to upload huge files to our server. We tried different techniques that work to a great extent, but not suitable when it comes to scaling to a huge number of users.
We started working on ways to make it scalable to a larger number of users to upload huge files on our system. Most of us developers would be like, “Just use AWS S3, I mean it supports RESTful API calls, so it would work just fine with your backend application”. Yes, absolutely right, the thing is we do not want to use AWS, we want to build the whole application free from third parties like AWS. Why this, well we have our own reasons for this, something I’ll not go over in this article.
So upon research, one team member suggested MinIO, an open source S3 alternative for huge file uploads. I tried it out and loved it. In this series of articles, we’ll take a dive into how this works and how you can use it yourself in your applications. Whether it’s a simple backend, AI application etc… You can use MinIO for this.
Let’s get started!
Core Concepts Of Object Storage
When it comes to object storage, there are some fundamental ideas that apply no matter the platform you are using (your own custom storage, your computer, AWS, MinIO etc) the core concepts are the same. We’ll take a look into some of these core concepts in this section.
Binary Large Object (BLOB)
As the name suggests, “Binary Object”, this is anything like a file, a video file, a music file, picture, etc. It can be of any size and of any type. As a normal computer user, we all use BLOBs each day, each time we play a song on our computer, we are working with BLOBs, each time you watch a movie, each time you edit a video clip on your computer, you are simply manipulating a BLOB object. Anything you interact with on your computer is basically a binary object.
For those of us familiar with databases, we know blob as a way of storing binary data like images, videos or audio files in a database. Those of us from web-development background specifically in JavaScript know blobs as a JavaScript object that represents raw binary data often used for file handling.
If you work with Machine Learning applications, the data being used in your pipelines are all BLOBs.
When it comes to MinIO we have the same concept, since all the data we work with in the digital age are all BLOBs, we can basically use MinIO to store this data. Each time we upload resources to MinIO, we are simply uploading BLOBs.
NOTE:
Each BLOB has a tonne of metadata we work with.
What Is A Bucket
Most data we interact with is BLOB, so where do we store this BLOB? Well, a place (not physical) where we store BLOBs is what we call a bucket. You can think of the storage on your local disk as a bucket since that is where all the BLOB data (music files, video files etc) are stored no? Buckets are simply volumes and individual drives.
In an S3 setting, we have the same concepts. In S3, each account can have a max of one hundred buckets. In MinIO, you do not have a limit on how many buckets you can have.
In S3 you simply interact with these buckets using RESTful APIs, performing PUT and GET requests to upload or retrieve BLOBs from the buckets (volumes) on some AWS hardware around the globe. In MinIO, you host these hardwares yourself having a globally unique DNS.
What Is Object Storage
So here’s the thing about object storage, it’s basically like having the most flexible digital filing system you can imagine. When I first started working with it, I was blown away by how different it is from traditional file systems.
Object storage gives you these things called flexible namespaces, think of them as your buckets. These aren’t just simple folders though, they’re more like smart containers that can store data however you want. You can go completely flat (just throw everything in one big pile with no organization), or you can create deeply nested structures with tons of prefixes.
Now, prefixes are basically like directories or folders, we’ll get into the nitty-gritty of prefixes later in this series, but for now just think of them as your typical folder structure.
Here’s where it gets interesting. Every object you store has three main parts: a unique ID (like a fingerprint), the actual data (your file), and metadata (information about that file). The cool part? You don’t need any external software or middleware to access any of this. Each object is completely self-contained, it’s like having a file that carries its own instruction manual.
This means you can work with your data however you want without worrying about dependencies. Need to check when something was uploaded? The metadata is right there with the object. Want to know the file type or size? It’s all packaged together.
But here’s what really sold me on object storage, unlimited scaling. I’m talking about going from storing a few terabytes to exabytes of data. And trust me, as your application grows and more users start uploading content, you’re going to need that scalability.
Object storages can be accessed using a simple RESTful API integration into your application, no matter what language it is in! Great right? I know.
The cloud-native design means you can deploy anywhere, from bare metal servers sitting in your office to fully orchestrated Kubernetes clusters. You get complete control over where your data lives, which was exactly what we needed for our project.
What Is S3 Compatible Object Storage
Now that we’ve covered what object storage is, let’s talk about something that’s going to make your life as a developer so much easier, S3 compatible object storage. The reason for this section is that most of us use S3 services as our storage layer, and this article is all about open source variations. Having said that, can I move my S3 storage layer dependent application to another storage layer provider like MinIO? The simple answer is yes. Let’s look into this.
AWS S3 is basically a RESTful object storage service that implements everything we just talked about. But here’s the kicker, when something is “S3 compatible,” it means you get a single API that works across any S3 compatible service.
This is huge for portability. Let’s say you’ve built your entire application around S3, but then you decide you want to move away from AWS (maybe for cost reasons, maybe you want more control, whatever). If you switch to an S3 compatible service like MinIO, you literally don’t have to rewrite your code. You can just pick up your application and move it to a different service whenever you want. That’s the kind of flexibility that saves you months of development time.
But it gets even better, this opens up multi-cloud deployments. You’re not locked into a single cloud provider anymore. Whether you prefer Amazon, Google Cloud, Azure, or even smaller providers like Digital Ocean, you can work with whatever platform you like. Your application doesn’t care because it’s all speaking the same S3 language.
Now, here’s something important to keep in mind: not all object storage services are truly S3 compatible. Many only provide partial compatibility, and there’s a reason for this. S3 isn’t open source, so to be truly compatible, these services have to do their own testing and reverse engineering to make sure everything works exactly like S3. It’s not always a perfect match.
So why does S3 compatibility matter so much? Beyond the portability and multi-cloud benefits, S3 has become the de facto standard for data integrations. I’m talking about tons of software providers building S3 compatibility right into their services.
Take the Elastic stack, it has S3 compatibility built into the backend. Spark? Same thing. Basically, any major service that deals with large amounts of data has S3 compatibility at this point. And it makes sense, if you’re storing tons of data, you need that scalable data layer that object storage provides.
This turns your S3 compatible object storage into this central resource, not just for your custom application, but for your entire ecosystem of tools. Think about it, if you’re using Kafka for data ingestion and it’s dropping results into S3 for persistent storage, and then you want to build an application that uses that data, having S3 compatibility makes everything seamless.
The data your application accesses is likely already in S3 or will be soon, thanks to all these tools that use S3 compatible storage as their go-to resource. This integration ecosystem is what makes S3 compatibility so powerful, you’re not just choosing a storage solution, you’re plugging into a whole infrastructure that’s designed to work together.
Why MinIO
Why should you really invest in using MinIO over more widely known providers like AWS S3? In this section, let’s take a look into some reasons you should or would do this.
- MinIO Is S3 Compatible Let’s imagine you want to build your application to eventually use S3 storage from AWS, but you do not want to spend money for the AWS S3 during development. Well, since MinIO is S3 compatible, you can spin up a docker container running MinIO and then develop your application on it. When you are ready to go into production and use AWS S3, you can simply switch over very simply.
2. Powerful Data Integrity MinIO supports very powerful data integrity. It can help recover from hard drive failure. It is reported that even if half of your drives lose data, MinIO can still help recover from it! I find this incredible.
3. Advanced Security MinIO servers have integrated with a variety of identity and access management providers like Keycloak, Okta WSO2 etc to allow application users to authenticate easily and securely to have access to the object storages on MinIO. You do not have to implement all these security features yourself, example Keycloak is open source and free to use.
4. Supports Local Deployment You can simply spin up a docker container to run and host MinIO locally on your computer for development. You can decide to move it to your cloud provider or local clusters, you get the freedom to move between different providers and hardware server options. You can also use Kubernetes for better scalability.
5. Supports Application Failover Using the Active-Active or the Active-Passive setup, this is due to the server side data replication.
MinIO Deployment Types
There are several topologies supported by MinIO, this topologies support different deployment types. Let’s take a look into some of these options.
Single Node Single Drive
Supports the basic setup you can need for a simple MVP or POC. Just one single drive so does not support redundancy of data, but supports versioning and object locking on retention. This is good for that first version of your application.
Single Node Multi Drive
Similar to the single node single drive, but instead of just one single drive, you have multiple drives hence supporting versioning, locking, replication, expansion and when there is a loss of data in one drive, the replica on the other drive(s) can be used, but failure of the node (server, computer) leads to downtime and total data loss. This is suitable for Beta of the MVP.
Distributed Multi Node Multi Drive
Supports versioning, locking, replication, expansion. Node and drive level redundancy. Data can only be lost when all nodes are down and their drives wiped out. If one node and its drives are down, no data will be lost due to the replication feature on MinIO. But can tolerate loss of up to half of the nodes and drives in the distributed deployment.
Setting Up MinIO Containers
Setting up and running MinIO is quite simple and straightforward. You can get it up in minutes if you already have Docker installed on your computer. I already do and will assume you too have Docker pre-installed. Here is a simple command you can run in your terminal.
Quick Start Single Container
The fastest way to get MinIO running is with a single Docker container:
docker run -p 9000:9000 -p 9090:9090 \
  --name minio \
  -v ~/minio/data:/data \
  -e "MINIO_ROOT_USER=minioadmin" \
  -e "MINIO_ROOT_PASSWORD=minioadmin123" \
  quay.io/minio/minio server /data --console-address ":9090"

What this does:
- Port 9000: MinIO API endpoint
- Port 9090: MinIO Console (web UI)
- Creates a data volume at
~/minio/data - Sets default credentials (change these!)
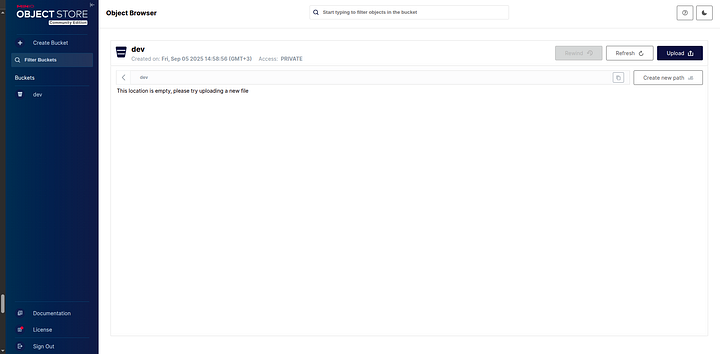
Once you navigate to the Web UI, you should see the dashboard, at this time of writing this article, it looks like this.

- Username: minioadmin
- Password: minioadmin123

Once logged in you should see a page like the one above.
To stop this container hit CTRL + C on your keyboard then run the following commands
docker stop minio2
docker rm minio2
Docker Compose Setup (Recommended)
Create a docker-compose.yml file:
version: '3.8'
services:
  minio:
    image: quay.io/minio/minio
    container_name: minio
    ports:
      - "9000:9000"
      - "9001:9001"
    volumes:
      - minio_data:/data
    environment:
      MINIO_ROOT_USER: minioadmin
      MINIO_ROOT_PASSWORD: minioadmin123
    command: server /data --console-address ":9001"
    healthcheck:
      test: ["CMD", "curl", "-f", "http://localhost:9000/minio/health/live"]
      interval: 30s
      timeout: 20s
      retries: 3
volumes:
  minio_data:
Run it:
docker-compose up -d
# or
docker compose up
Once done, you can run:
docker compose down
Production-Ready Setup
For production, you’ll want better security and persistence:
version: '3.8'
services:
  minio:
    image: quay.io/minio/minio
    container_name: minio
    ports:
      - "9000:9000"
      - "9001:9001"
    volumes:
      - /opt/minio/data:/data
      - /opt/minio/config:/root/.minio
    environment:
      MINIO_ROOT_USER: ${MINIO_ROOT_USER}
      MINIO_ROOT_PASSWORD: ${MINIO_ROOT_PASSWORD}
      MINIO_SERVER_URL: https://minio.yourdomain.com
      MINIO_BROWSER_REDIRECT_URL: https://console.yourdomain.com
    command: server /data --console-address ":9001"
    restart: unless-stopped
    healthcheck:
      test: ["CMD", "curl", "-f", "http://localhost:9000/minio/health/live"]
      interval: 30s
      timeout: 20s
      retries: 3
Create a .env file:
MINIO_ROOT_USER=your_secure_username
MINIO_ROOT_PASSWORD=your_very_secure_password_here

Then run the following commands
docker compose up
To bring down the containers run:
docker compose down
Ports
- 9000: This is for the API itself that you can call in your application via HTTP
- 9090: This is for the console dashboard you can access in your browser.
Volumes
- Path of data on your computer: data directory on your container
For Security
For security, you can set the root user namd and the root user password using environment variables.
set MINIO_ROOT_USER=my_root_username
set MINIO_ROOT_PASSWORD=my_very_secret_passcode
You can also use the .env approach if you are using a docker compose setup.
Incase you do not set this username and password for the root user, MinIO has default credentials for this.
- Username: minioadmin
- Password: minioadmin
NOTE:
1. DO NOT use the root user in your application itself, only for console access and nothing else.
2. DO NOT use the default in production
3. DO NOT use the root user for client access
Create user for each client access, user for each application connecting to your buckets.
Creating Client Users
- DO create a dedicated user for each client
- User access should follow the principle of least priviege (give only required permissions/access/roles)
Using SDK TO Interact With MinIO
You can use the MinIO Python SDK or the boto3. You might be wondering why boto3, “I thought boto3 was a Python package to interact with AWS S3 buckets”, yes very true. The reason you can also use the boto3 to interact with MinIO is because MinIO is S3 compatible. You can use boto3 if you want to, but in this video, I am using MinIO package itself.
Uploading Files Using The UI
To get started, we’ll first create a bucket and upload a file and a folder to this bucket. We’ll then delete them and do the same thing programmatically using the SDK.
Creating A Bucket
We’ll first begin with creating a bucket we can use to upload a file and a folder into. We’ll keep it flat and simple for the meantime. To do this follow these steps:
- Start the docker container for MinIO
docker compose up
2. Click on the web UI link as shown in the terminal

3. Creating A Bucket

4. Uploading A File

5. Upload Folder

Now let’s delete all these uploads and then begin working on uploading these resources again using the SDK.

Installation
To use MinIO, we need to install at least Python 3.7 or higher. We’ll install it as well as an environment package reader. I am going into the directory where we created the docker compose files previously.
python3 -m venv venv
source venv/bin/activate
pip install minio python-dotenv
Building on the previous examples we have created, we can go ahead and run the Python application.
touch lesson_01.py
from minio import Minio
from dotenv import load_dotenv
import os
load_dotenv()

MINIO_ROOT_USER = os.getenv("MINIO_ROOT_USER")
MINIO_ROOT_PASSWORD = os.getenv("MINIO_ROOT_PASSWORD")

# Initialize client
client = Minio(
    "localhost:9000",
    access_key=MINIO_ROOT_USER,
    secret_key=MINIO_ROOT_PASSWORD,
    secure=False
)

print(client.list_buckets())
python3 lesson_01.py
NOTE: Make sure the virtual environment is activated before that.

You can also create the bucket using the SDK, but I will not do that in this case.
NOTE: I am using the root account in my code despite of mentioning and warning against it cause I am using the community version of MinIO. If you are using the enterprise version with a license it should be a different story for you.
Having asid that, let’s use the SDK to upload a file to the bucket.
from minio import Minio
from minio.error import S3Error
from dotenv import load_dotenv
import os

load_dotenv()

MINIO_ROOT_USER = os.getenv("MINIO_ROOT_USER")
MINIO_ROOT_PASSWORD = os.getenv("MINIO_ROOT_PASSWORD")

# Initialize client
client = Minio(
    "localhost:9000",
    access_key=MINIO_ROOT_USER,
    secret_key=MINIO_ROOT_PASSWORD,
    secure=False
)

def upload_folder(client, bucket_name, local_folder_path, minio_folder_path=""):
    """
    Upload an entire folder to MinIO bucket

    Args:
        client: MinIO client instance
        bucket_name: Name of the bucket
        local_folder_path: Path to local folder to upload
        minio_folder_path: Path prefix in MinIO (optional)
    """
    print(f"Uploading folder: {local_folder_path}")
    uploaded_count = 0

    # Check if the folder exists
    if not os.path.exists(local_folder_path):
        print(f"Error: Folder {local_folder_path} does not exist")
        return 0
    The default is always true as well.
    if not os.path.isdir(local_folder_path):
        print(f"Error: {local_folder_path} is not a directory")
        return 0

    # Walk through all files in the folder
    for root, dirs, files in os.walk(local_folder_path):
        for file in files:
            # Get the full local file path
            local_file_path = os.path.join(root, file)

            # Create the MinIO object name (path in bucket)
            # Remove the local folder path prefix and add minio folder path
            relative_path = os.path.relpath(local_file_path, local_folder_path)

            if minio_folder_path:
                minio_object_name = f"{minio_folder_path}/{relative_path}"
            else:
                # Use the folder name as prefix
                folder_name = os.path.basename(local_folder_path.rstrip('/'))
                minio_object_name = f"{folder_name}/{relative_path}"

            # Convert Windows backslashes to forward slashes for MinIO
            minio_object_name = minio_object_name.replace("\\", "/")

            try:
                # Upload the file
                client.fput_object(
                    bucket_name,
                    minio_object_name,
                    local_file_path
                )
                print(f"✓ Uploaded: {local_file_path} -> {minio_object_name}")
                uploaded_count += 1
            except Exception as e:
                print(f"✗ Failed to upload {local_file_path}: {e}")

    return uploaded_count

try:
    print(client.list_buckets())

    buckets = client.list_buckets()

    for bucket in buckets:
        print(bucket.name)

    # Check if we have any buckets
    if not buckets:
        print("No buckets found. Creating a default bucket...")
        bucket_name = "my-bucket"
        client.make_bucket(bucket_name)
        print(f"Created bucket: {bucket_name}")
        # Refresh buckets list
        buckets = client.list_buckets()

    print("Uploading file...")
    try:
        client.fput_object(
            bucket_name=buckets[0].name,
            object_name="myfile.txt",
            file_path="./data/myfile.txt"
        )
        print("File uploaded successfully")
    except FileNotFoundError:
        print("Error: ./data/myfile.txt not found")
    except Exception as e:
        print(f"Error uploading file: {e}")

    print("Uploading folder...")
    try:
        # Upload folder using our custom function
        uploaded_files = upload_folder(
            client=client,
            bucket_name=buckets[0].name,
            local_folder_path="./data/myfolder"
        )

        if uploaded_files > 0:
            print(f"Folder uploaded successfully! {uploaded_files} files uploaded.")
        else:
            print("No files were uploaded from the folder.")

    except Exception as e:
        print(f"Error uploading folder: {e}")

    print("Listing objects...")
    try:
        objects = client.list_objects(buckets[0].name, recursive=True)

        print(f"\nObjects in bucket '{buckets[0].name}':")
        object_count = 0
        for obj in objects:
            print(f"  - {obj.object_name}")
            object_count += 1

        if object_count == 0:
            print("  (No objects found)")
        else:
            print(f"\nTotal objects: {object_count}")

        print("Objects listed successfully")

    except Exception as e:
        print(f"Error listing objects: {e}")

except S3Error as e:
    print(f"MinIO S3 error: {e}")
except Exception as e:
    print(f"Unexpected error: {e}")
Running this code:


Just like AWS S3, you can also generate a shareable link and share it with someone:

NOTE:
When creating the client, we turned of the TLS so that we can make use of the the local servers running on HTTP. In production, we’ll be using HTTPS so we need to turn TLS on bu setting secure=True .
client = Minio(
    "localhost:9000",
    access_key=MINIO_ROOT_USER,
    secret_key=MINIO_ROOT_PASSWORD,
    secure=True
)
The default is always true as well.
MinIO Python SDK Examples
Let’s explore a few examples of the Python SDK to get a better feel for how to use the SDK.
Generating A Presigned Link For Uploading Objects
If you have ever worked with AWS S3 buckets, you are more familiar with working with presigned links. If not, you can think of a presigned link as simply a web link that contains some tokens giving you permission to upload resources to a storage location online that link has an expiry date associated with it.
You can generate the presigned link through the UI as well if you wanted to.
Steps To Generate Presigned Link Via Web UI
- Click on the resource you want to generate a presigned URL for.
- On the sidebar on the right, click on share.
- Specify the days, hours and minutes you want the URL to be valid for.
- Copy the generated link, that is the presigned link

Generating Presigned URLs Programmatically
We can also generate presigned URLs programmatically using code. To do this, we’ll be using the Python SDK.
- Create a Python file called
lesson_02.py - Add the following content inside of this file
- Update the
.envfile as well as needed - Run the code in
- The generated output is the presigned URL
Content of lesson_01.py file:
from minio import Minio
from minio.error import S3Error
from dotenv import load_dotenv
from datetime import timedelta
import os

load_dotenv()

MINIO_ROOT_USER = os.getenv("MINIO_ROOT_USER")
MINIO_ROOT_PASSWORD = os.getenv("MINIO_ROOT_PASSWORD")
BUCKET_NAME = os.getenv("BUCKET_NAME")

# Initialize client
client = Minio(
    "localhost:9000",
    access_key=MINIO_ROOT_USER,
    secret_key=MINIO_ROOT_PASSWORD,
    secure=False
)

# Create bucket if it doesn't exist
if not client.bucket_exists(BUCKET_NAME):
    raise Exception(f"Bucket {BUCKET_NAME} does not exist")
else:
    try:
        # Get presigned URL to upload data to 'myfile.txt' in
        # 'dev' bucket
        url = client.presigned_put_object(
            bucket_name=BUCKET_NAME,
            object_name="myfile.txt",
            # Default expiry is 7 days
            expires=timedelta(hours=2),
        )
        print(url)
    except S3Error as e:
        print(e)
Content of your .env file:
MINIO_ROOT_USER=your_root_username
MINIO_ROOT_PASSWORD=your_password
BUCKET_NAME="dev"
To run the code, I used the terminal, using this commands:
python3 lesson_02.py

If you wish to specify the content-type of resource to be uploaded, gaining more control over what is to be uploaded then we can also do that.
Content of lesson_03.py file:
from minio import Minio
from minio.error import S3Error
from dotenv import load_dotenv
from datetime import timedelta
import os

load_dotenv()

MINIO_ROOT_USER = os.getenv("MINIO_ROOT_USER")
MINIO_ROOT_PASSWORD = os.getenv("MINIO_ROOT_PASSWORD")
BUCKET_NAME = os.getenv("BUCKET_NAME")

# Initialize client
client = Minio(
    "localhost:9000",
    access_key=MINIO_ROOT_USER,
    secret_key=MINIO_ROOT_PASSWORD,
    secure=False
)

# Create bucket if it doesn't exist
if not client.bucket_exists(BUCKET_NAME):
    raise Exception(f"Bucket {BUCKET_NAME} does not exist")
else:
    try:
        # Get presigned URL to upload data to 'myfile.txt' in
        # 'dev' bucket
        url = client.get_presigned_url(
            "PUT",
            BUCKET_NAME,
            "myfile.txt",
            expires=timedelta(days=1),
            response_headers={"response-content-type": "application/plain"},
        )
        print(url)
    except S3Error as e:
        print(e)
Running the code:
python3 lesson_03.py

When it comes to HUGE files, I prefer using the multi-part uploads. This helps you upload your resources in chunks and you can resume upload in case of any failure from the point where the upload failed, it does not start uploading from scratch all over again. This is particularly good when you are building applications for areas where there is poor internet connection. I believe it is a good thing to have in general. Now that you have understood the idea behind multi-part upload, or at least have a clue of it, let’s write some simple code to help us achieve presigned URLs that we can use for the part uploads.
- Create a file called
lesson_04.py
from minio import Minio
from minio.error import S3Error
from dotenv import load_dotenv
from datetime import timedelta
import os

load_dotenv()

MINIO_ROOT_USER = os.getenv("MINIO_ROOT_USER")
MINIO_ROOT_PASSWORD = os.getenv("MINIO_ROOT_PASSWORD")
BUCKET_NAME = os.getenv("BUCKET_NAME")

# Initialize client
client = Minio(
    "localhost:9000",
    access_key=MINIO_ROOT_USER,
    secret_key=MINIO_ROOT_PASSWORD,
    secure=False
)

# Create bucket if it doesn't exist
if not client.bucket_exists(BUCKET_NAME):
    raise Exception(f"Bucket {BUCKET_NAME} does not exist")
else:
    try:
        # Step 1: Initiate multipart upload
        object_name = "large-file.zip"
        headers = {"Content-Type": "application/octet-stream"}
        upload_id = client._create_multipart_upload(
            BUCKET_NAME,
            object_name,
            headers=headers
        )

        print(f"Multipart upload initiated. Upload ID: {upload_id}")

        # Step 2: Generate presigned URLs for each part
        total_parts = 5  # Adjust based on your file size
        presigned_parts = []

        for part_number in range(1, total_parts + 1):
            # Generate presigned URL for uploading each part
            url = client.get_presigned_url(
                "PUT",
                BUCKET_NAME,
                object_name,
                expires=timedelta(hours=1),
                extra_query_params={
                    "partNumber": str(part_number),
                    "uploadId": upload_id
                }
            )

            presigned_parts.append({
                "part_number": part_number,
                "url": url
            })
            print(f"Part {part_number} URL: {url}")

        # Step 3: After client uploads all parts, complete the upload
        # This would be called after collecting ETags from successful uploads
        """
        Example completion (uncomment when you have the ETags):

        parts = [
            {"PartNumber": 1, "ETag": "etag1"},
            {"PartNumber": 2, "ETag": "etag2"},
            # ... more parts
        ]

        client._complete_multipart_upload(
            BUCKET_NAME,
            object_name,
            upload_id,
            parts
        )
        print("Multipart upload completed!")
        """

        # Step 4: Abort upload if needed (cleanup)
        # client._abort_multipart_upload(BUCKET_NAME, object_name, upload_id)

    except S3Error as e:
        print(f"Error occurred: {e}")
2. Run the code:
python3 lesson_04.py

You can see we generated 5 presigned links, meaning the file will be chunked into 5 separate sections, and each section or chunk will be uploaded individually to our MinIO.
import os
import logging
from typing import Dict, List, Optional, Tuple
from datetime import timedelta
from dataclasses import dataclass
from minio import Minio
from minio.error import S3Error
from dotenv import load_dotenv
# Configure logging
logging.basicConfig(level=logging.INFO)
logger = logging.getLogger(__name__)
@dataclass
class PartInfo:
"""Information about a multipart upload part"""
part_number: int
url: str
size: int = 0
etag: Optional[str] = None
@dataclass
class MultipartUploadInfo:
"""Information about a multipart upload session"""
upload_id: str
object_name: str
bucket_name: str
parts: List[PartInfo]
total_size: int = 0
class MinIOMultipartManager:
"""Production-ready MinIO multipart upload manager with presigned URLs"""
def __init__(self, endpoint: str = None, access_key: str = None,
secret_key: str = None, secure: bool = False):
"""
Initialize MinIO client
Args:
endpoint: MinIO server endpoint (default: localhost:9000)
access_key: Access key (default: from env MINIO_ROOT_USER)
secret_key: Secret key (default: from env MINIO_ROOT_PASSWORD)
secure: Use HTTPS (default: False for local development)
"""
load_dotenv()
self.endpoint = endpoint or "localhost:9000"
self.access_key = access_key or os.getenv("MINIO_ROOT_USER")
self.secret_key = secret_key or os.getenv("MINIO_ROOT_PASSWORD")
if not self.access_key or not self.secret_key:
raise ValueError(
"MinIO credentials not found. Set MINIO_ROOT_USER and MINIO_ROOT_PASSWORD")
try:
self.client = Minio(
self.endpoint,
access_key=self.access_key,
secret_key=self.secret_key,
secure=secure
)
logger.info(f"MinIO client initialized for {self.endpoint}")
except Exception as e:
logger.error(f"Failed to initialize MinIO client: {e}")
raise
def ensure_bucket_exists(self, bucket_name: str) -> bool:
"""
Ensure bucket exists, create if it doesn't
Args:
bucket_name: Name of the bucket
Returns:
True if bucket exists or was created successfully
"""
try:
if not self.client.bucket_exists(bucket_name):
self.client.make_bucket(bucket_name)
logger.info(f"Created bucket: {bucket_name}")
return True
except S3Error as e:
logger.error(f"Error with bucket {bucket_name}: {e}")
return False
def initiate_multipart_upload(self, bucket_name: str, object_name: str,
file_size: int, chunk_size: int = 5 * 1024 * 1024,
expires: timedelta = timedelta(hours=1),
headers: Dict = None) -> MultipartUploadInfo:
"""
Initiate a multipart upload and generate presigned URLs for all parts
Args:
bucket_name: Target bucket name
object_name: Target object name
file_size: Total size of the file in bytes
chunk_size: Size of each part in bytes (default: 5MB)
expires: Expiration time for presigned URLs
headers: Optional headers for the object (e.g., Content-Type)
Returns:
MultipartUploadInfo containing upload_id and presigned URLs
"""
if not self.ensure_bucket_exists(bucket_name):
raise Exception(f"Cannot access bucket {bucket_name}")
try:
# Calculate number of parts
total_parts = (file_size + chunk_size - 1) // chunk_size
if total_parts > 10000: # S3 limit
raise ValueError(
f"File too large. Would require {total_parts} parts (max 10000)")
# Initiate multipart upload
headers = headers or {"Content-Type": "application/octet-stream"}
upload_id = self.client._create_multipart_upload(
bucket_name,
object_name,
headers=headers
)
logger.info(
f"Initiated multipart upload: {upload_id} for {object_name}")
# Generate presigned URLs for each part
parts = []
for part_number in range(1, total_parts + 1):
# Calculate part size (last part might be smaller)
part_size = min(chunk_size, file_size -
(part_number - 1) * chunk_size)
url = self.client.get_presigned_url(
"PUT",
bucket_name,
object_name,
expires=expires,
extra_query_params={
"partNumber": str(part_number),
"uploadId": upload_id
}
)
parts.append(PartInfo(
part_number=part_number,
url=url,
size=part_size
))
upload_info = MultipartUploadInfo(
upload_id=upload_id,
object_name=object_name,
bucket_name=bucket_name,
parts=parts,
total_size=file_size
)
logger.info(
f"Generated {len(parts)} presigned URLs for multipart upload")
return upload_info
except S3Error as e:
logger.error(f"Failed to initiate multipart upload: {e}")
raise
def complete_multipart_upload(self, upload_info: MultipartUploadInfo,
parts_etags: List[Dict[str, any]]) -> bool:
"""
Complete a multipart upload
Args:
upload_info: MultipartUploadInfo from initiate_multipart_upload
parts_etags: List of dicts with 'PartNumber' and 'ETag' keys
Returns:
True if upload completed successfully
"""
try:
# Sort parts by part number
sorted_parts = sorted(parts_etags, key=lambda x: x['PartNumber'])
# Validate all parts are present
expected_parts = set(range(1, len(upload_info.parts) + 1))
received_parts = set(part['PartNumber'] for part in sorted_parts)
if expected_parts != received_parts:
missing = expected_parts - received_parts
raise ValueError(f"Missing parts: {missing}")
# Complete the upload
self.client._complete_multipart_upload(
upload_info.bucket_name,
upload_info.object_name,
upload_info.upload_id,
sorted_parts
)
logger.info(f"Completed multipart upload: {upload_info.upload_id}")
return True
except S3Error as e:
logger.error(f"Failed to complete multipart upload: {e}")
return False
def abort_multipart_upload(self, upload_info: MultipartUploadInfo) -> bool:
"""
Abort a multipart upload (cleanup)
Args:
upload_info: MultipartUploadInfo from initiate_multipart_upload
Returns:
True if aborted successfully
"""
try:
self.client._abort_multipart_upload(
upload_info.bucket_name,
upload_info.object_name,
upload_info.upload_id
)
logger.info(f"Aborted multipart upload: {upload_info.upload_id}")
return True
except S3Error as e:
logger.error(f"Failed to abort multipart upload: {e}")
return False
def list_incomplete_uploads(self, bucket_name: str, prefix: str = None) -> List[Dict]:
"""
List all incomplete multipart uploads in a bucket
Args:
bucket_name: Bucket name to check
prefix: Optional prefix filter
Returns:
List of incomplete upload information
"""
try:
uploads = []
for upload in self.client.list_incomplete_uploads(bucket_name, prefix):
uploads.append({
'upload_id': upload.upload_id,
'object_name': upload.object_name,
'initiated': upload.initiated
})
return uploads
except S3Error as e:
logger.error(f"Failed to list incomplete uploads: {e}")
return []
def cleanup_incomplete_uploads(self, bucket_name: str, prefix: str = None) -> int:
"""
Clean up all incomplete multipart uploads
Args:
bucket_name: Bucket name to clean
prefix: Optional prefix filter
Returns:
Number of uploads cleaned up
"""
try:
count = 0
for upload in self.client.list_incomplete_uploads(bucket_name, prefix):
self.client._abort_multipart_upload(
bucket_name, upload.object_name, upload.upload_id
)
count += 1
logger.info(f"Cleaned up upload: {upload.upload_id}")
return count
except S3Error as e:
logger.error(f"Failed to cleanup incomplete uploads: {e}")
return 0
def get_upload_progress(self, upload_info: MultipartUploadInfo) -> Dict:
"""
Get upload progress information
Args:
upload_info: MultipartUploadInfo from initiate_multipart_upload
Returns:
Dict with progress information
"""
try:
parts_info = self.client.list_parts(
upload_info.bucket_name,
upload_info.object_name,
upload_info.upload_id
)
uploaded_parts = len(list(parts_info))
total_parts = len(upload_info.parts)
return {
'upload_id': upload_info.upload_id,
'object_name': upload_info.object_name,
'uploaded_parts': uploaded_parts,
'total_parts': total_parts,
'progress_percent': (uploaded_parts / total_parts) * 100 if total_parts > 0 else 0
}
except S3Error as e:
logger.error(f"Failed to get upload progress: {e}")
return {'error': str(e)}
if __name__ == "__main__":
manager = MinIOMultipartManager()
upload_info = manager.initiate_multipart_upload(
bucket_name="dev",
object_name="/home/prince/Downloads/98.12.2 (1)/98.12.2.zip",
file_size=141 * 1024 * 1024,
headers={"Content-Type": "application/octet-stream"}
)
# Returns upload_id directly and proper presigned URLs
print(f"Upload ID: {upload_info.upload_id}")
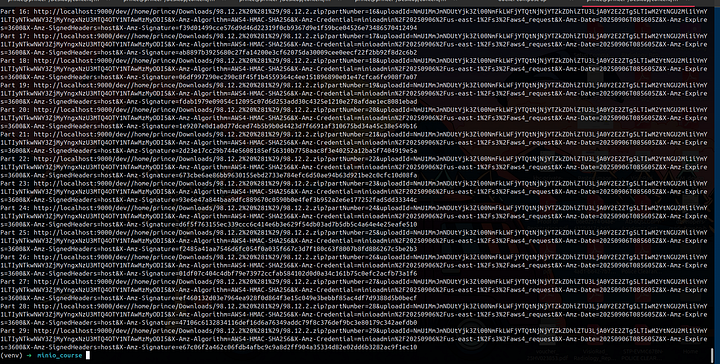
for part in upload_info.parts:
print(f"Part {part.part_number}: {part.url}")
Running the code:
python3 lesson_05.py
NOTE:
In the above code, make sure you specify the file you wish to upload.
Conclusion
Congratulations for making it this far. We have now learnt how to use an AWS-S3 compatible alternative that is free and open source. Hope you found value in this article and you get to apply it in your real world projects.
Other platforms where you can reach out to me:
Happy coding! And see you next time, the world keeps spinning.